Set up your queue system, one screen at a time
Every configuration step for an on-premise queue system — the ticket buttons, the ticket station, the TV display, the layout, and the Queue Manager at each counter. Real screenshots, in the order you'll actually do them.
Three things to have ready
None of this takes long, but chasing a missing WiFi password halfway through a counter install is how a one-hour job becomes an afternoon.
Network access
The WiFi name and password, or a spare LAN point at each device. Every part of the system talks over your own network — there is nothing to configure on the internet side for an on-premise install.
Your list of services
The names customers will see on the ticket buttons — Registration, Payment, Inquiry, Collection. Decide these first; they set the ticket prefixes and the whole numbering scheme.
The connection details
The address of the machine running the Queue Manager, plus the port we set at installation. We hand these to you when the system is commissioned — write them down once and every display and counter uses the same pair.
Follow these in order
Click any step to open it. The first one is expanded to get you going.
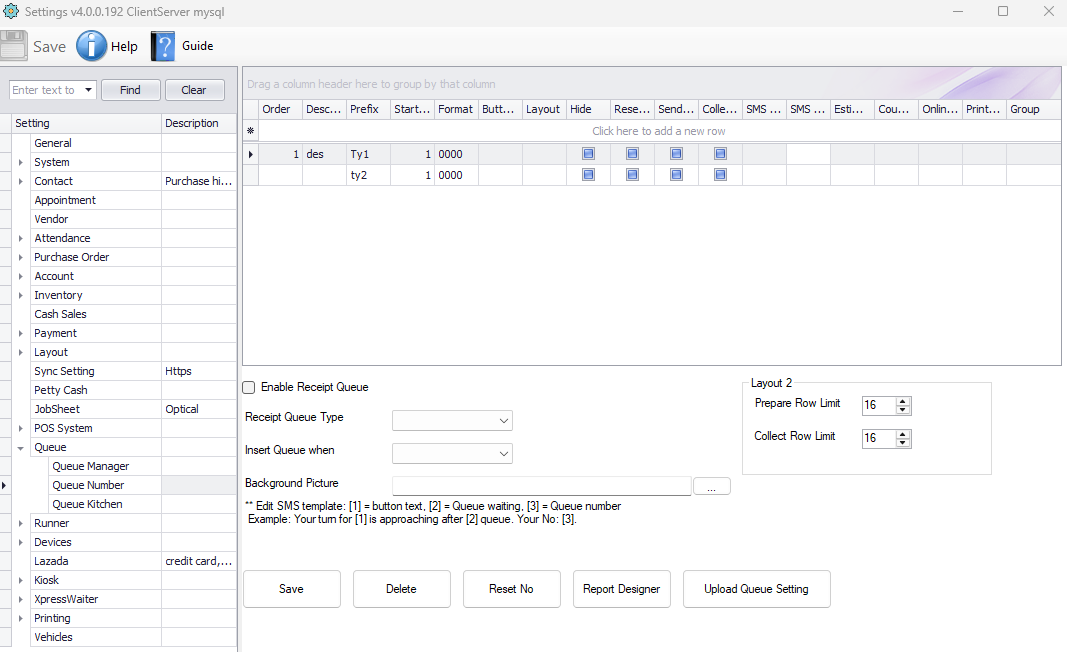
Each service you offer becomes one button on the ticket station. Give it a name, a prefix and a starting number, and the printer produces the right ticket the moment a customer touches it.
- 1 Open the queue software on the ticket station and go to Settings
- 2 Navigate to Queue → Queue Number
- 3 Add a row for each service — description, prefix, start number
- 4 Set the Button Text exactly as customers should read it
- 5 Choose the format so the printed number reads the way you want
- 6 Repeat for every service type
- 7 Click Save — the buttons appear on the station straight away
Two words at most. A customer standing at a kiosk reads the screen in about two seconds, and a long label is the fastest way to get people queuing at the wrong counter.
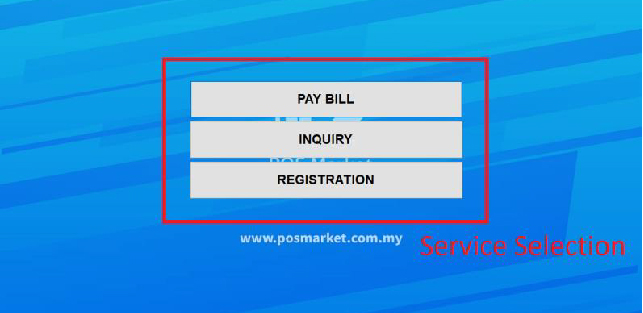
Once the buttons are saved, the station runs itself. Staff log in once in the morning and leave it on the service selection screen for the rest of the day.
- 1 Start the queue software on the station
- 2 Select the Queue Number module
- 3 Enter the station username and password
- 4 Click Login — the service buttons fill the screen
- 5 The customer touches the service they need
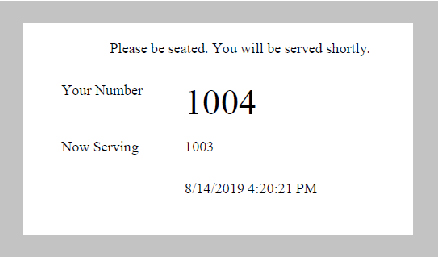
- 6 The ticket prints immediately, with the number now serving on it
Their own number and the number currently being served are both printed. That one detail is what stops people asking staff how long the wait is.
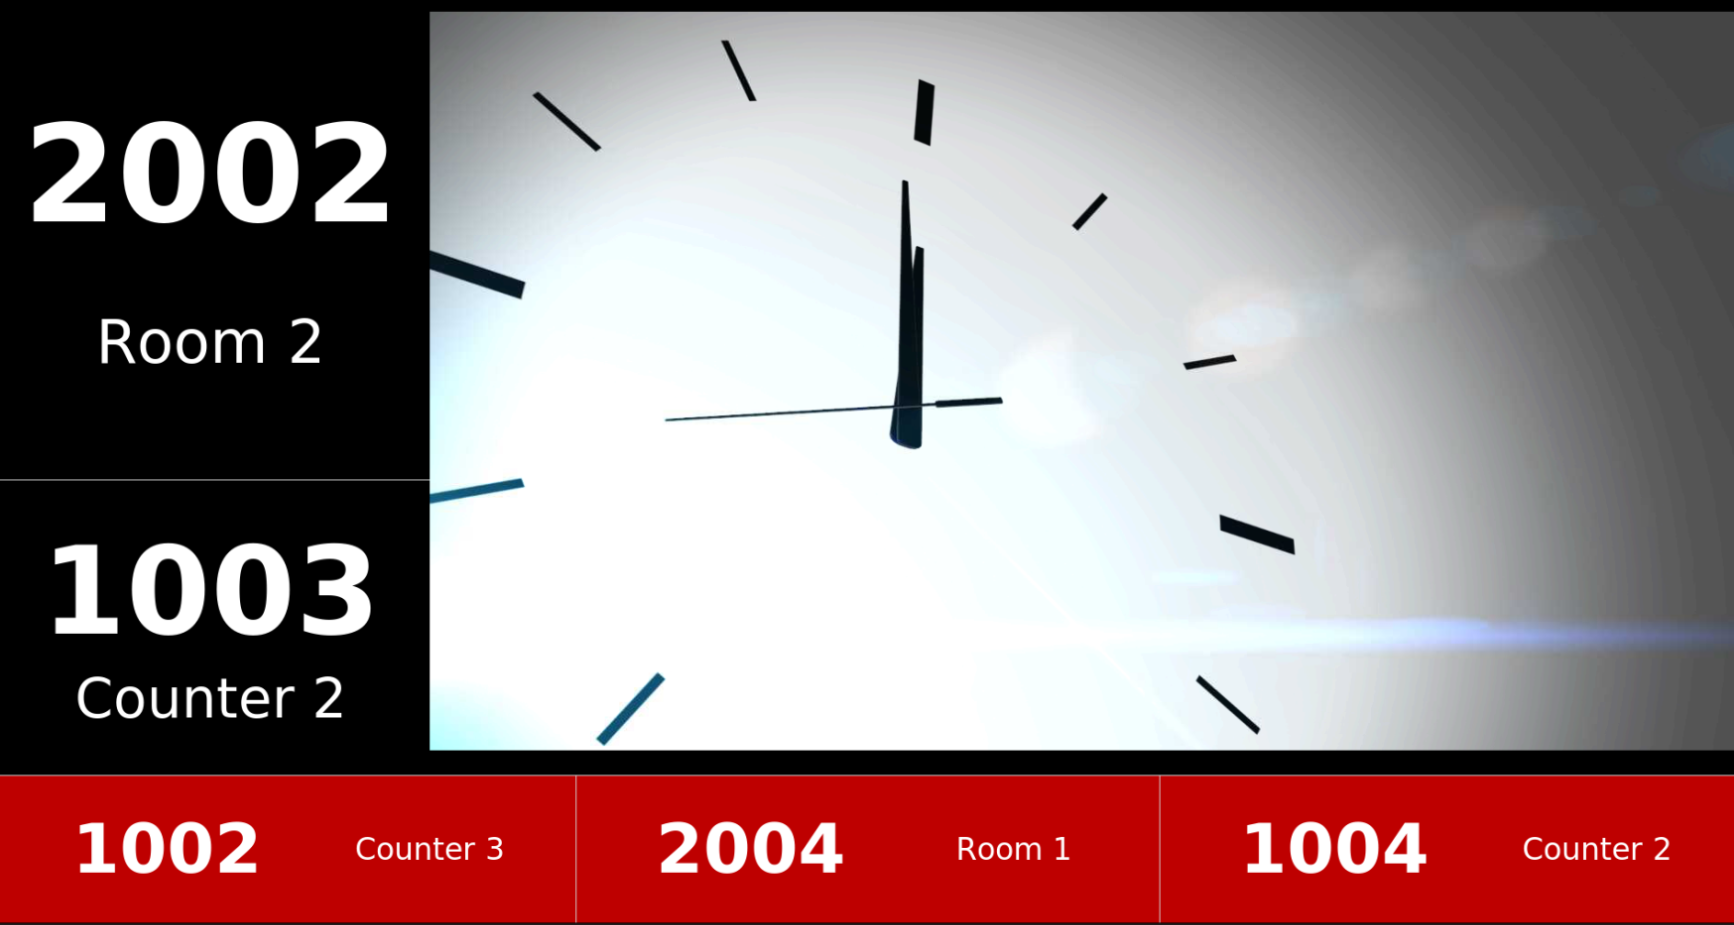
The display box drives any TV over HDMI. Give it network access, tell it where the Queue Manager is, restart it, and it stays live from then on — including through a power cut, because it comes straight back up on its own.
- 1 Plug the display box into the TV with an HDMI cable and power it on
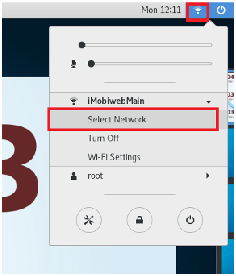
- 2 Open the network menu from the top bar and choose Select Network
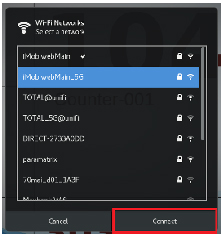
- 3 Pick your WiFi and connect — or plug in a LAN cable instead
- 4 Open Setting from the top-right of the display screen
- 5 Enter the Queue Manager address and port from your commissioning sheet
- 6 Set the counter text and how many columns of numbers to show
- 7 Save, then restart the box — the display goes live
Announcements play through the TV's own speakers. With several screens in one hall, leave the voice enabled on one of them only — otherwise the same number is called back at you three times over.
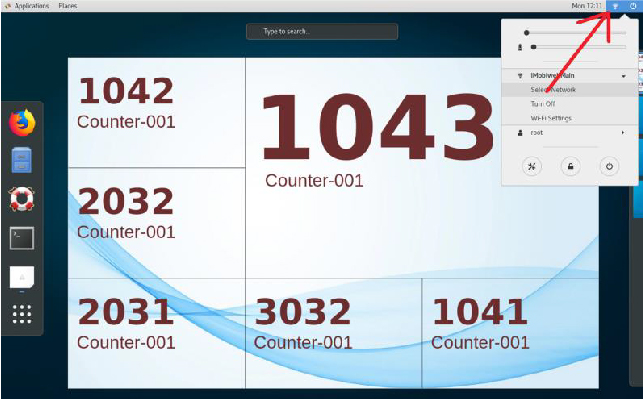
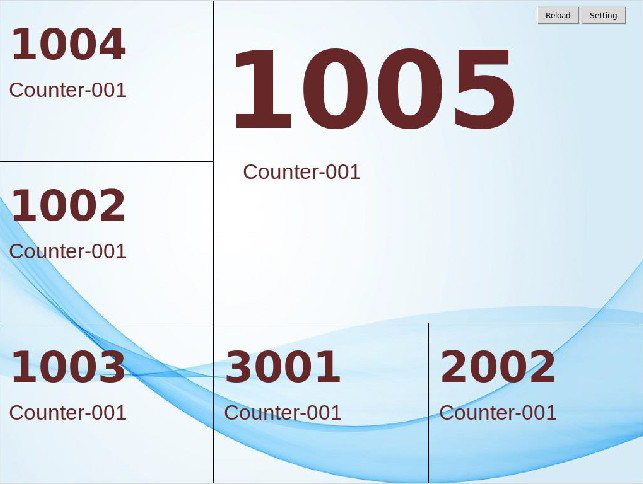
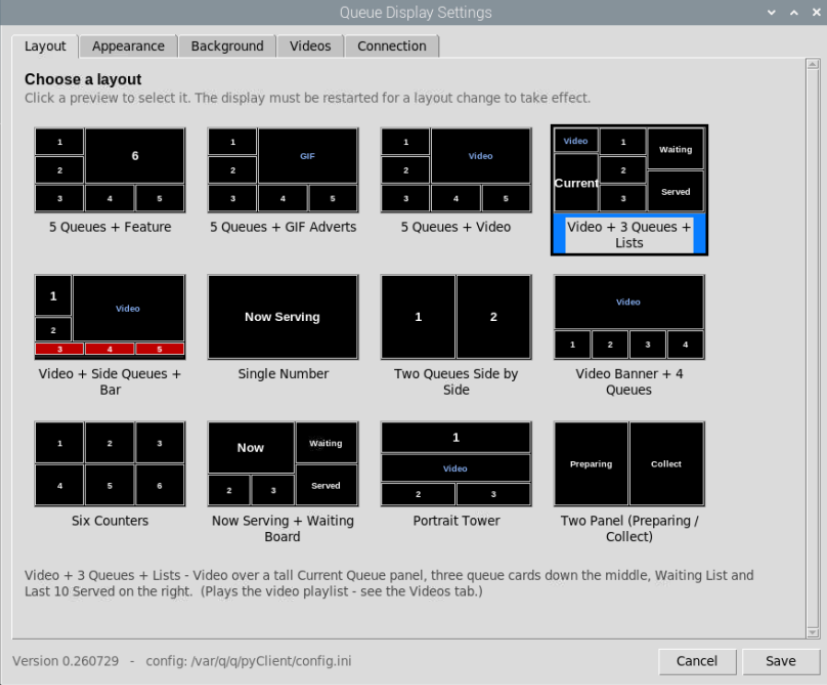
The layout decides how the screen is divided — one huge number, six counters side by side, a video panel with queues down the edge. Click a preview to select it, then restart the display for the change to take effect.
- 1 Open Setting on the display and go to the Layout tab
- 2 Click the preview that matches your counter count and screen shape
- 3 Use Appearance to set font scale and the counter text
- 4 Use Background to upload your own image or logo
- 5 Use Videos to add a playlist for the layouts with a video panel
- 6 Save and restart the display to apply the layout
A single huge number reads from the back of a large hall. Six counters at once works when people are seated close. Portrait Tower is for the tall screens in a lift lobby. Full walkthrough on the QDisplay page.
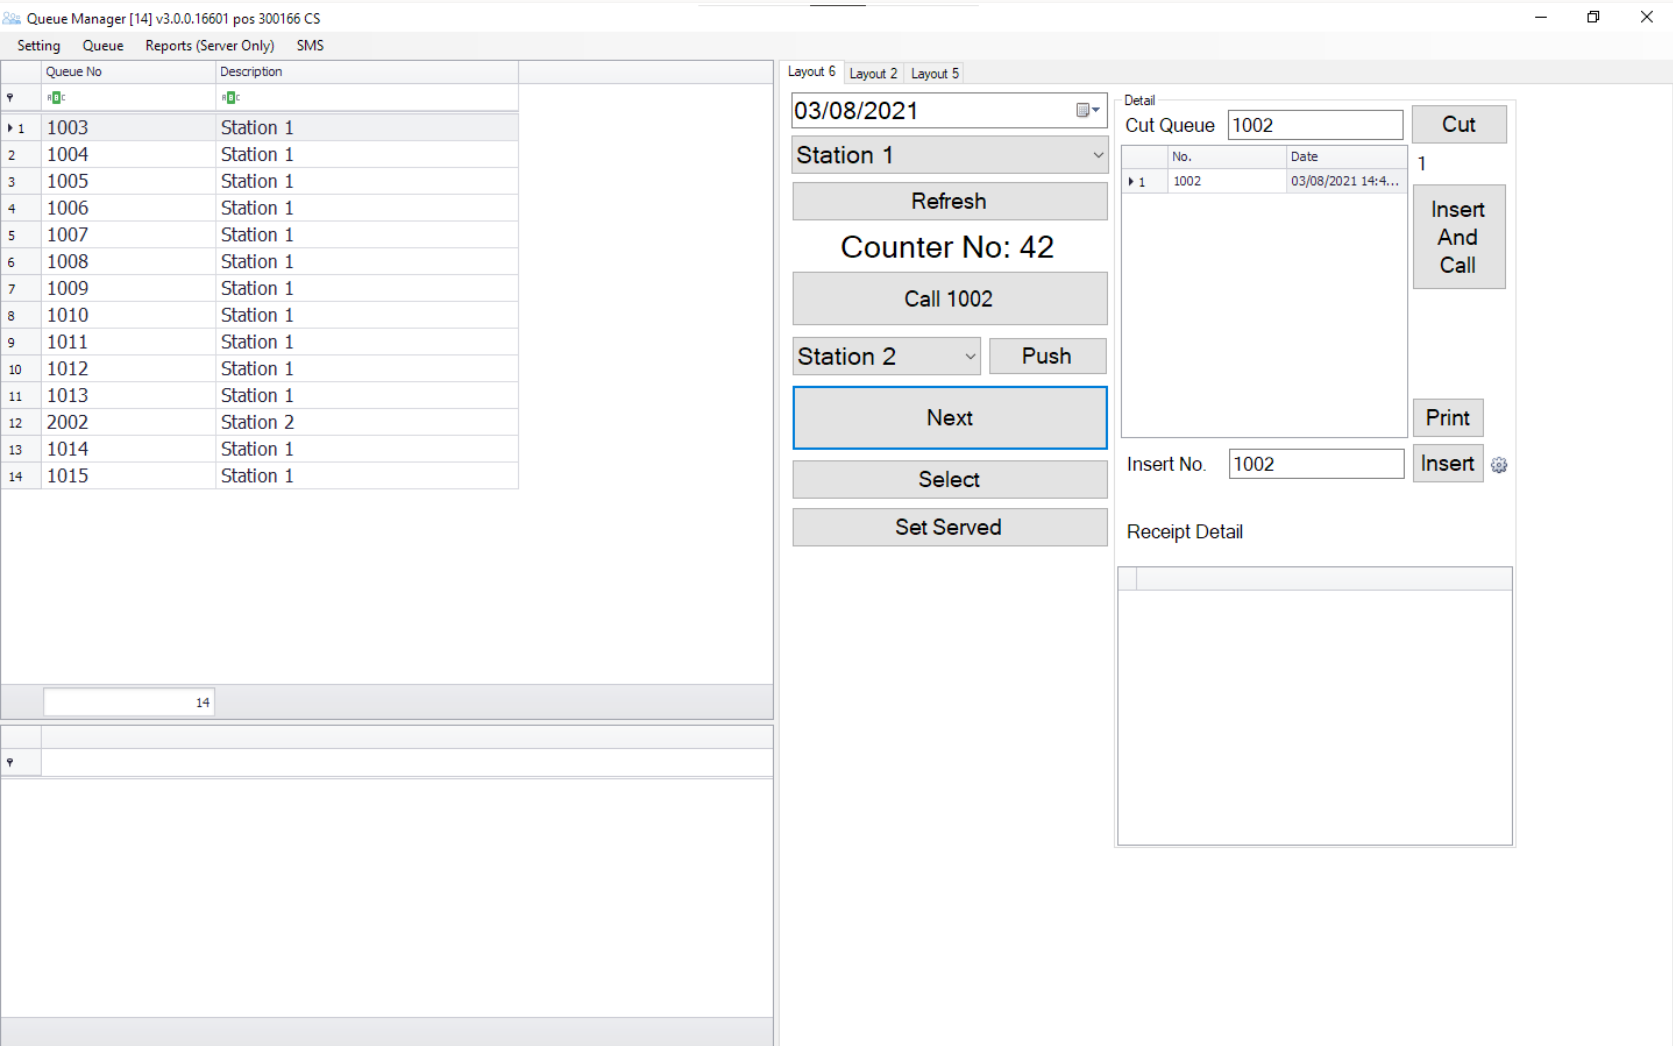
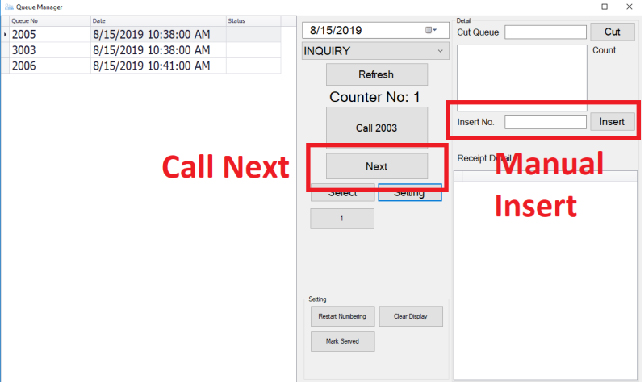
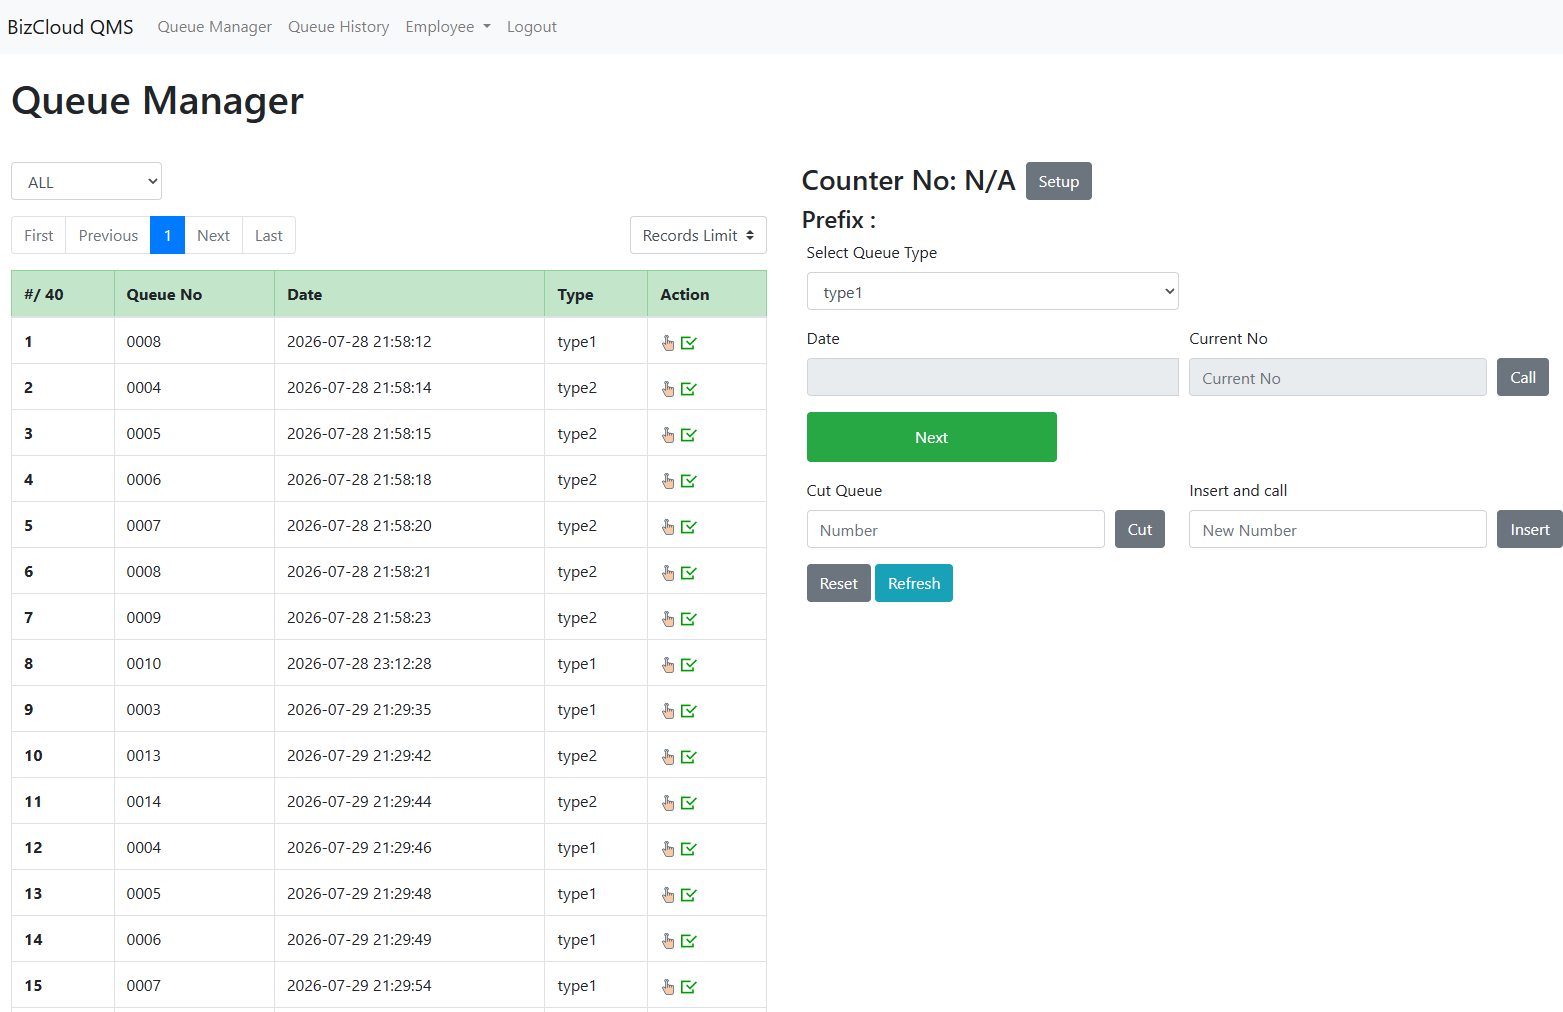
One Queue Manager per counter. Staff log in with their counter number and work from a single screen for the rest of the shift — call the next customer, recall one who didn't hear, insert a walk-in by hand, or push someone to another department.
- 1 Install the Queue Manager on the counter PC
- 2 In Setting, enter the server address and set the Counter No
- 3 Log in with the counter's own username and password
- 4 Press Next to call the next customer in line
- 5 Press the Call button again to repeat the announcement
- 6 Use Insert to add a number manually, Cut Queue to bring one forward
- 7 Restart Numbering resets the day's series when you need a clean start
With several counters running, one Queue Manager acts as the server the ticket stations and displays connect to. The rest connect to it. We set which one during commissioning — it is normally the machine that stays switched on longest.
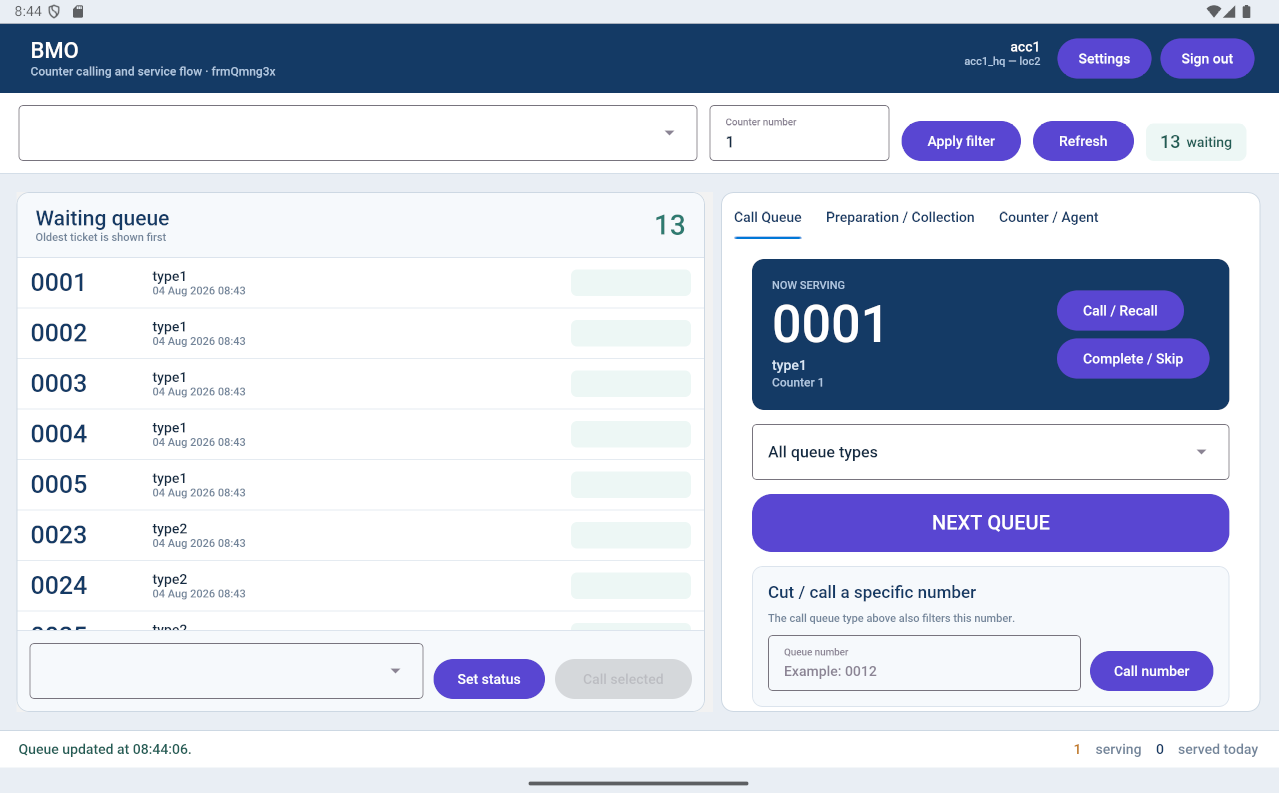
Not every counter needs a PC. Staff can work the queue from an Android tablet or from a browser on any machine on the network. Both routes need one thing the Windows-only setup can skip: a shared database.
- 1 Install the database server on one Windows machine on your network
- 2 In the Queue Manager's database settings, switch from stand-alone to client and server
- 3 Point every counter at that same database
- 4 On a tablet, install the app and log in with the counter credentials
- 5 For browser counters, open the web Queue Manager address on your network
- 6 Check your plan — counter and web client limits are set per company
A Windows-only setup can run without a separate database server. The moment a tablet or a browser counter is involved it becomes a requirement. It can share an existing PC, but it has to exist somewhere — see the server page.
Rather not do any of this?
Our own team installs it — hardware, network, displays, counters and staff training, on site. We cover the whole of Malaysia and Singapore, with engineers based in Kuala Lumpur, Penang and Johor Bahru.
Where to go next
Stuck on a step?
Send us a photo of the screen you're on. Our support team reads it and tells you exactly what to change — usually within the hour during business days.